Showing posts with label crafts. Show all posts

12/23/08

A Star for Christmas

I made some lovely 3-D paper barn stars with one of the classes at school and I liked them so much I made one for home too. This craft is fairly simple, so I thought I'd share in case some of you are looking for an easy, last-minute craft to keep or give.


Start by printing a star from the internet. I made mine almost as wide as a piece of printer paper. Cut the star out. This one will be your pattern. Precision is important in your tracing and cutting for this craft, but if things are a little off it will still turn out nicely.


Next, use a sharp pencil and a ruler to draw lines from each "point" of the star to the "valley" of the star across from it. All of the lines will intersect in the middle.


You will need to use the two parts that make up one of the points. Label one "L" for light and the other "D" for dark.


Trace the star pattern onto a piece of thick paper. This will be the base of your finished star, so pick a color that will coordinate with the colors you will use for the star. I used a piece of white card stock. The paper should still be thin enough to bend.


Now, cut out the two triangles that you labeled light and dark. Choose two colors of patterned craft paper, one that is lighter in value and one that is darker in value. Trace the "L" triangle five times on the lighter paper and the "D" triangle five times on the darker paper. Do not turn the triangle patterns over. The letter you wrote on it should always face up. Carefully cut them out. Cut them inside the pencil line that you traced so that you cut the line off. That way it won't show and the triangles won't be too large.


Now, it's time to start assembling your star. You will glue a light and a dark triangle on each point of the thicker star you cut out of card stock. The whole thing will fit together like a puzzle. If there is a little extra space in between each triangle that is fine. It will help when it is time to fold. It is important that none of your triangles overlaps another one. That will impede folding the star.


Mine are all glued. You can see that it is not perfect and that there is a small gap between the pieces.


It is time to fold. The alternating light and dark triangles will add to the 3-D look. Fold each point individually so that the ridges running to the points stick up and the ridges running to the valleys stick down. All of the folds meet in the middle. The small gaps between the triangles should make folding very easy. The paper will want to bend at the gap. Voila! Your barn star is complete.


I hung mine by a little loop of ribbon on the bathroom wall. Where will you hang yours?
If you have more time and want to be even more creative you can do what we did in school. Each kid painted their own paper first. They painted colors and patters and used stamps. One area of the paper they made dark and one light. They made sure each of their areas were big enough to cut five or more triangles out of it. They used reds and greens, burgundies and metallic golds. They painted with craft acrylics on drawing paper that was about the weight of card stock or just a little lighter. It was thick enough not to buckle when they painted on it. They were lovely!
Experiment and see what you can come up with.
Happy creating!


8/17/08

Chain Maille


What does a crafty teen who has just visited the Renaissance Festival do with her last weeks before college begins? She picks up and masters a new hobby, of course.

Julia and her friends were intrigued by the chain maille for sale at the Renaissance Fair. She bought a small bracelet that drapes over the hand in a "V" and loops around the middle finger. It was an innocent enough purchase at first. Now, she is hooked. Now, there are bags of jump rings littering every horizontal surface in the house and pliers lain askew on place mats and coffee tables. And, there is a young lady, her eyes glued to a laptop monitor in front of her, pliers in both hands, who wrestles these stainless jump rings into all kinds of intricate patterns and beautiful weavings. We have a chain maille junkie on our hands!

Seriously though, the jewelry she is making is quite lovely. When one thinks of chain maille, if they are like me, they think of chunky suits worn by knights to protect them from glancing sword blows. But, this craft has grown to be much more. There are so many different fancy "weaves" and patterns that have crossed over from chain maille's once strictly utilitarian purpose to resemble something of art.

Julia has become so intrigued with this process and so proficient at her new craft that she is even considering selling her work, which I might add goes for a pretty penny online. Bravo to her for teaching herself this wonderful pastime and creative outlet.

My kids' creativity and ability to look up how to do something and then do it and do it well never ceases to amaze me.

4/12/08

Rocks in My Head

I feel like I have rocks in my head this morning. What I really have is a nasty cold complete with low-grade fever. So, painting and outdoor activities are out today.

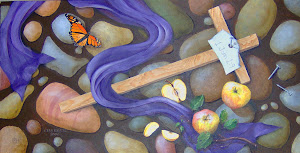
I was inspired, in my feverish state, by the post at Socks and Books about their excursion to a rock museum as well as the awe-inspiring rocky landscapes at Short on Words. I've always admired and collected rock. They are infinitely unique in color, size, texture, and pattern. Rocks have made their way into my house and into my art quite often.


You may recall the vignette I set up before Christmas using rocks we had collected in Canada. Over time the little set-up had become rather dusty and the pine needles had lost their rust coloring. So, I re-purposed the rocks and moss to create a new vignette in our pass-through area between the kitchen and great room. Shawn likes to use this area to draw his maps (which I will share with you in another post) and I thought he might like a tiny picturesque landscape in his drawing nook.


Some of the rocks were used in the nook, others now enhance the lovely table-top fountain Julia gave me for Christmas. When rocks are wet, they are at their best. The colors sing and the surface glows.

Our greatroom is full of rocks! Here are some small compositions I shot within the larger framework of some of my paintings that hang in that room.

Humans have been painting rocks and painting on rocks since the earliest know art. Rocks have been both painted on and painted with in the form of crushed minerals mixed with animal fat. From the Lascaux Cave paintings in France, to the open air rock engravings in Norway, people have chosen rocks as a source for artwork because of their permanence, availability, and of course their beauty.


If you've been inspired by rocks as I have and would like to try your hand at drawing some of the rocks around you, here is a rock drawing tutorial I found at eHow.

3/18/08

Pysanky Workshop


As promised, I have some pics from the Pysanky workshop I held in my studio. Two homeschooled students, a mom and her three girls, my kids, and two of their friends participated in our three hour class. They learned that Pysanky egg decorating originated in the Ukraine and that its intricate patterns and colors are symbolic. They learned about the tools used in making Pysanky and the steps in the process. Then, each participant made their own egg as we followed a traditional pattern, step by step, together. After the first eggs were complete the students created free form egg designs of their own choosing. At the end of the workshop each person took home with them: two finished eggs, a kistka, beeswax, an instruction guide, and a catalog with which to purchase dyes if they wish to make more eggs in the future.


Pysanky is a wax resist process. Beginning with a fresh, white egg, you cover areas of the egg with melted wax using a kistka. When you dip the egg into the first dye bath, the places you covered with wax will remain white. After each dye bath, when the egg has dried, you cover the areas with wax that you wish to stay that color before proceeding to the next dye bath. When the design is complete and all the dyeing is done, you hold the egg close to a candle flame to remelt the wax so you can wipe it from the egg revealing your finished design. Removing the wax from the finished egg is like discovering hidden treasure!


If making Pysanky is something you wish to find out more about and perhaps try your hand at, here are some resources for you:


  • Learn Pysanky: Step by step basic instructions, symbol and color meanings, egg designs, and many other wonderful bits of information.


It was so nice to hold the kistka in one hand and a fresh egg in the other, to feel the soft melted wax flow onto the egg shell, and to smell the waxy goodness of burning candles and hunks of beeswax. There is something so comforting in working with low-tech tools on a traditional craft that has endured the test of time. Even though I have no Ukrainian in my family heritage, I feel a connectedness to the past and a gratefulness for those who are willing to share their customs with the rest of the world.

3/9/08

Flotsam and Jetsam

This place was a debris field this morning, inside and out. Over the last couple of days we've had snow, sleet, freezing rain, more snow, wind, cold temperatures....until there was a nice build-up of ice on everything, including the snow. Last night, when the wind began to pick up, the heavily laden tree branches whipped the side of the house sending shards of ice crashing into the windows and trickling down the slope of the roof, sounding like some percussion section gone awry. Several times throughout the evening and overnight I was certain a window would break and I'd be picking up scattered branches from the floor while desperately searching for a tarp to cover a gaping hole in the side of the house! This morning when I looked outside, the beaming sun was making diamonds out of the shards of glass that had fallen during the night. Sharp points of broken ice protruded from every near horizontal surface, looking like a virtual ice mine field. Branches were down all over the yard. In some neighborhoods entire trees were down, as well as the power lines that were under them. Although the commotion from the storm kept me awake a good deal of the night, at least we didn't lose power. Many others in our area weren't as fortunate.


Some of the downed branches and ice shards in our front yard.


Although the ice was a nuisance, it sure made lovely patterns on the garage door window for Shawn to photograph!


It also made amazing photo opportunities for Julia. Hopefully those beginning buds won't be impacted by their time in the deep freeze.


The studio is also littered with debris today, not of the icy kind though. Yesterday I held a Pysanky workshop in my studio. I taught nine students, kids through adults, the Ukrainian art form then we created lovely egg masterpieces. One of the participants, a friend of Julia's, took some pics of the event. When he has a chance to put them on disk for me I'll show you what we did. For now, the messy studio pics will have to suffice!


All those raw eggs and not one was broken even by the youngest students!


Tonight I am crashing like those ice shards! Shawn has continued making Pysanky, but I am properly positioned on the comfy couch with my feet propped and my lap top in front of me. It's been quite a weekend! Perhaps I'll be able to catch up on that lost sleep tonight.

2/4/08

Over the Weekend

The first thing I did this weekend was to come down with a nasty cold. I spared you a pic of my hoard of used, wadded tissues! I figured Earle shouldn't have to suffer alone, so now we are suffering together.


Since we were contagious we stayed home from church on Sunday. Julia and Shawn worshipped with friends at their church then spent the afternoon hiking in the snow. When they all headed back to "the sickie house" we met them with a big pot of homemade beef stew, mashed potatoes, peas, and chunky applesauce with cinnamon. Later that evening we cheered for New England in the Superbowl until their untimely loss at which point Earle, a Maine-iac by birth, decided it was OK for NY to claim a victory as he was officially a New Yorker now. He has actually lived in NY longer than Maine by about a year. I'm thinkin' he'll never really convert though. You can take the boy out of Maine...you know the rest. Anyway, we munched on some other yummy snacks during the game: homemade potato skins (these were a BIG hit!), homemade guacamole with chips, and breaded cheese sticks. It was nice to have an excuse for consuming so many foods of questionable nutritional value! When the post-game chatter died down it was time for a special episode of House. Wow, he may have some redeeming qualities after all. Did you catch the show?

Since I was quaranteened the whole weekend, I actually spent some time in the studio working on polymer clay projects. I am designing an assortment of spoons with decorative clay handles. A friend of mine used to sell these creations for me in her cyber-cafe, but she went out of business last year. My next adventure is to open an Etsy shop where I can once again market some of my wares. I'll let you know when it's up and running.


Wouldn't you just love to dish up some fruit dip at a summer picnic with this spoon?

Also on Saturday, my order came for new Pysanky supplies. I will be holding a Pysanky class as well as teaching a few friends how to make these beautiful Ukranian eggs. New dyes, chunks of wonderful smelling beeswax, and kistkas.

One of my favorite eggs. It is still intact inside though I made it several years ago. I decided not to blow it out, but to let it dry out over time. I think the "wholeness" of the egg helps to symbolize the Easter promise of new birth and a new life in Christ.

What did you do this weekend?

1/29/08

The Chess Set

One of my blog readers requested more pictures of the polymer clay chess set my son made when was in 7th grade. She would like to delve into polymer clay with her kids. We used to have polymer clay spread across the table for weeks on end, so my son was quite familiar with working with clay when he made this set. Having always been a big history fan, he chose the Greeks and the Barbarians as the theme for the two opposing sides.

The clay he used was Sculpey III. After it was formed and baked, he antiqued the pieces by painting on a thin wash of burnt sienna acrylic paint and then wiping it off while it was still wet. The small amount of paint that remained in the recessed areas gave the pieces an antiqued feel and brought out their dimension. The last step was to load an old scraggly brush with some gold acrylic paint and then wipe the brush off on paper towels. The brush was then rubbed across the pieces to leave a slight golden sheen on the highlighted areas. This technique is called "dry brush" as there is very little paint on the brush after wiping it off on the towels.

Shawn also made the chess board from a piece of wood. He divided up the board into the appropriate grid using a ruler and a pencil. Then he used a wood burning tool to create the detail. Next, he used a small brush and some stain to give the board its distinctive dark and light spaces. Last, he coated the whole board with polyurethane.


Chess anyone?

The Barbarians

Up close on the Barbarian side: The bag of loot represents a knight, the sword and shield represent the rook, the coins represent the bishop, and the fabric with the crown atop represents the queen. The texture on the loot bag came from pressing the clay onto a piece of fabric.

The Greeks


Up close on the Greek side: the column represents the rook, the cup and drapery represents the queen, and the block of stone with a metal band represents the knight.

Shawn had a lot of fun designing and creating this set. We've played with it often and it has held up pretty well. The king, Poseidon, on the Greek side had a laurel wreath around his trident at one time, but it broke off. The other casualty over time has been the shields on the Barbarian side coming loose from their rock supports. A little hot glue fixed them back up in no time.

Set your kids (or yourself) loose with some Sculpey and see what you can create!

12/7/07

Mitten Tales


The work table hints at the projects I've been working on this week. Glass ornament blanks and polymer clay are strewn around the table waiting patiently to become one of these:


Each year I make an ornament for my sisters, brother, and nephews whom I see at the holidays. We have given up exchanging gifts for the most part as all our kids have grown to "teenhood" and beyond, but I still feel the need to give them something when we get together on Christmas Day.

This year's theme of tiny mittens is evident in my choice of ornament designs and my latest felt pillow adorned with polymer clay mittens that now brightens the felt and embroidery area of my studio. It's finally done save stitching up the bottom where I stuffed it.


This is the craft that inspired all the others. Several years ago I made this felt mitten garland and it instantly became, and has remained, one of my very favorite Christmas decorations. This year it graces the doorway between the great room and the kitchen.

Who doesn't love a precious little mitten?


11/28/07

Nature's Simple Beauty

I love rocks. Especially beach rocks, rounded by the ebb and flow of the sea. Polished, smooth. I collect rocks. I paint pictures of rocks. I have decorative rocks in my garden. I have a bag full of rocks we collected several years ago on a beach in Cape Breton, Canada, a most magical place.

The beach in Cape Breton. It just cries out to rock hounds doesn't it?
So, this bag of rocks finally became a part of my world. They are no longer relegated to the shelf in the basement.
I sorted out several sizes and then gave them a light coat of clear nail polish. Now they look like they do when you are at the beach and the rocks are damp and their colors are heightened.
Then, I took a tray, and a bag of preserved moss, and some pine needles collected from the neighbor's trees across the street, and three candles I bought on clearance at the craft store, and I arranged them into a miniature wonderland.

The candle light makes the rocks sing.
Oh, that I was small enough to walk around this little rock garden and leap from stone to stone.

Nature's simple beauty

So quick and so easy. Bring some nature inside this holiday season. It will bring joy to your heart and peace to your soul.

10/30/07

Felt Projects

I so enjoyed making the felt pillows that I decided to tackle a few more projects that have been floating around in my head. So far I have used inexpensive polyester craft felt from Michael's, but I would like to find a good source for some wool felt. The colors and richness of the texture is so much nicer. At 10-20 cents a sheet this stuff is really cheap though! Cheap is always a good thing when you are playing around with new ideas.

A goodie bag for Shawn's door. You are never too old for Halloween candy. Two refills on the peanut butter cups and counting.

Julia's goodie bag has had its second refill of Dove chocolates. Hmm, it appears to be empty again at the moment...


An orange-marmalade cat bookmark for my sister Kathy. We both have fall birthdays and will be celebrating together in a couple of weeks. Since she is in South Carolina right now and away from her computer I am safe showing the pic before the gift is given!

A work in progress. This time the pillow will be for Christmas. I drew the swirly winds with chalk and am now stitching them with silver metallic embroidery floss. The polymer clay mittens have been waiting for a purpose. I poked button holes in them before they were baked. Now I can sew them on the pillow, swirling and twirling in the frosty breeze. A few stitched snowflakes will complete the wintry look.

Mitten detail.

Little winter mittens are precious things don't you think? I shall have to update you all when the pillow is finished.